Many of my friends and family are known for their talents in a particular craft. Some of you would say that I do all kinds of things, and I do, but I would like to do something a little different and do it well. I did some searching and have settled on making chenille projects and hats, the basic bucket hat.
My guy, John, bought me a new sewing machine about nine years ago and it’s recently started giving me problems. So, I decided to order a new one. It arrived last week and came with 30 different stitches and many ways to use them.
The manual reads like an encyclopedia. My old machine had 6 stitches. I started looking for patterns that would use all or some of the stitch designs. That was when I came up with the hat idea, I have yet to give it a try, but I did do a small chenille project.
Katie, the rock painter friend, had given me some leftover flannel from some projects that she had done. I thought it would make a great chenille bath mitt for my grandchildren that live out of province, as flannel frays and fluffs out really nicely, to say nothing of how it absorbs water, I still remember all the cloth dippers I washed.
I started out with five seven-inch squares. I layered 4 one on top of the other all face up. I then stitched a straight line through all 4 layers. I started down a half inch from the top and in a half inch from the edge, sewing to within a half inch of the bottom.
I continued this all the way across the square. With a small pair of scissors, cut very carefully between the rows of stitching all the way from top to bottom, through only 3 layers.
The forth layer needs to be intact as it is the inside top of the bath mitt.
Once you have all the cutting finished you will need to attach the bottom layer. Turn the top layer upside down and lay the back piece face up.
Turn it all over and stitch a half-inch seam on 3 sides. You will need to flip the cut ends back so you can stitch underneath them.
I did not finish the edges or do a hem, as I wanted the frayed look all around it as well as on the top. Next you need to wash it, I made 3 and washed and dried them with some towels to fluff them really well. The more they are washed the more they will fluff.
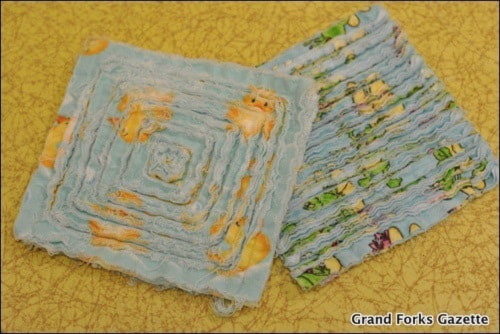
When they come out of the dryer you will need to trim a few of the threads that wash out. It takes only a minute or two to do. The whole project took about an hour with cutting and sewing. I stitched one of the squares in a square pattern, it looks pretty cool. I’m now looking for more projects to create.
Happy Crafting!!!
GO CANUCKS GO!